Started writing with Imagine

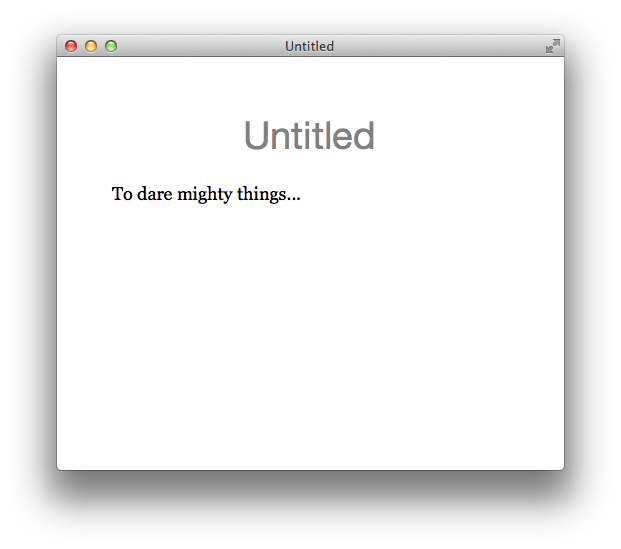
I’ve decided to try writing with Imagine.

On any given day I have a checklist to write, a couple paragraphs of help text to fine-tune or other little writing tasks. I’ve used TextEdit and MS Word but I don’t like the cluttered UI, nor do I need 100 options. To escape TextEdit, lately I’ve taken to using my code editor TextMate, which is ill-suited for simple text writing.

Right now, the pros for Imagine are simple:

  • It’s ready to write when I open it
  • It’s readable out of the box
  • It’s lightweight and free

We’ll see how it shakes out.

Filters, not options: Download Shortcode 1.0

In rewriting one of my plugins recently, I decided to try an experiment I like to call Filters, not options (a play on the oft-repeated WordPress mantra of Decisions, not options).

I think whenever you conceive a plugin, you’re aware that it has an express purpose and is meant to be used in a specific way. That purpose should be your guiding light.

The plugin, in case you’re wondering, is the recently-released 1.0 update of my Download Shortcode plugin, which allows users to output force-download links for files via a shortcode.

Out of the box, the Download Shortcode only supports files that live in the uploads directory. If you don’t have ‘pretty permalinks’ enabled on your site, the full URL including the download-script endpoint are exposed. If you do have ‘pretty permalinks’ enabled, the URLs will be rewritten to mask the endpoint, which is better for security. And none of this requires configuration outside of the normal WordPress site setup. Easy.

OK, so what if I wanna change it up?

Use the filters supplied in the readme. If you’re a developer or adventurous user, the examples should be more than enough of primer to get you started.

Example filters include:

  • Ability to change the rewrite endpoint
  • Change the supported directory
  • Disable rewrites regardless of ‘pretty permalink’ usage
  • Hiding the shortcodes after the plugin is deactivated or removed

Why do it this way?

Simple, it’s all about the 80/20 rule. 80 percent of this plugin’s users expect it to work in a very specific way. The remaining 20 percent might want to fudge with things a bit to fit their needs and that’s fine, but I’m inclined to cater to the majority.

Inevitably, this begets the discussion of whether filters can serve equally as well as options. I think they can and I’d go even further to say that I don’t think that extra options suit every plugin. Returning for a moment to the 80/20 rule, if 80 percent of your users won’t need the options, adding them is unnecessary overhead. It’s supposed to do a thing and it does it. If you want more out of it, you can use the filters or fork it and modify it however you want. The beauty of open aource.

Is this a perversion of the spirit of using filters in plugins? Is this even a good idea? I’m curious to hear from other plugin authors and welcome the feedback.
What does the Enable Image Scaling plugin do?

A lot of people have contacted me in the last year about my Enable Image Scaling plugin to ask me what exactly it does.

It’s a valid question, mostly because many people don’t understand the distinction between scaling and cropping. Put simply, scaling is like resizing. The plugin resizes — or scales-down — your image(s) on upload.

So why would you want to do that? Smaller images make for faster websites.

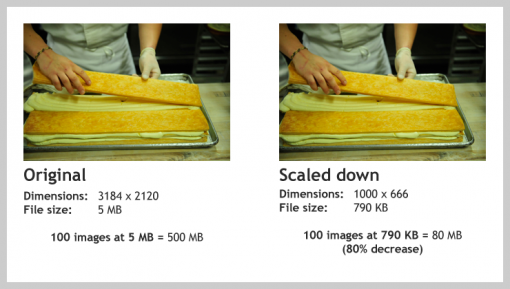
I’ve worked up a little example to try demonstrating the benefits of scaling down images on your WordPress site.

Image scaling comparison

Let’s say you have an image, we’ll call it bakery.jpg. You’ve just downloaded it off of your camera and it has the following stats:

  • Dimensions: 3184 x 2120 pixels
  • File size: : 5.1 MB

By most accounts, that’s a pretty big image. And that’s about par for the course when it comes to modern digital cameras.

And let’s say that in the last year, conservatively, you’ve uploaded 100 images to your photo blog or whatever. That’s roughly 500 MB of images.

Now let’s say you decided to scale all uploaded photos to have a max width or height of 1000px. When scaled down from 3184px to 1000px width, the image now has the following stats:

  • Dimensions: 1000 x 666 pixels
  • File size: 790 KB

If you had scaled down all 100 images on your photo blog to 1000px width, they would now have a cumulative file size of roughly 80 MB, which is an 80 percent decrease.

Year over year, stored images can really start to add up and it doesn’t make a lot of sense to store huge, original images on a server if they can’t be viewed to their full potential anyway. Enable Image Scaling can help you keep things sensible.